Induction
A lot of setup work
- Induction
- Blog
- Branching
- Check Git installation
- Check your Planner
- Create a work folder
- Development process
- Forking a repository
- Git and Github for poets
- GitHub.dev
- Handshake
- Inspecting a commit
- Inspecting previous versions
- Install VSCode
- Interview Introductions
- Learning as a community
- Next steps
- Professional Accounts
- Setting up Coursework planner
- Sharing history
- Version control software
- Viewing files from a git clone
- Working locally
- Wrapping up Git
Induction block viewer
This block viewer lets you flick through all the existing blocks in the Induction folder so you can choose what parts to add to your pages and what parts you might want to create, revise, or leave out.
It's literally just an alphabetical list of whatever is in this folder.
Blog
Imagine that two people are writing a blog. Ahmed and Naima are writing a blog together about their struggles learning coding.
The published blog is live here 👉 Educational blog
✍️exercise 1.1
Branching
Learning Objectives
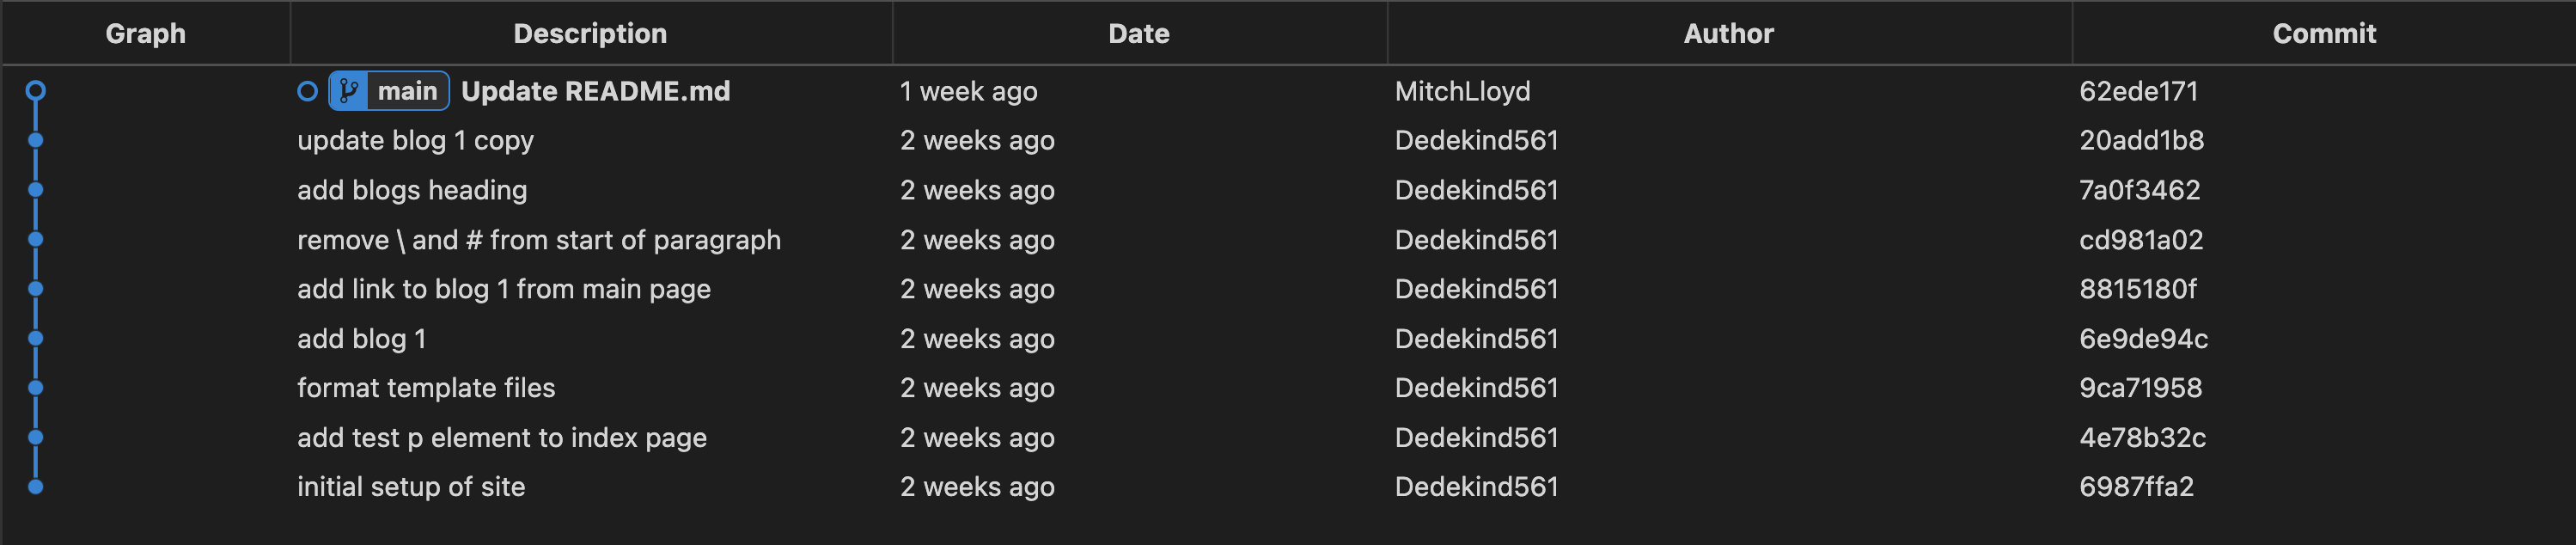
We can check the commits on the remote repository as before:
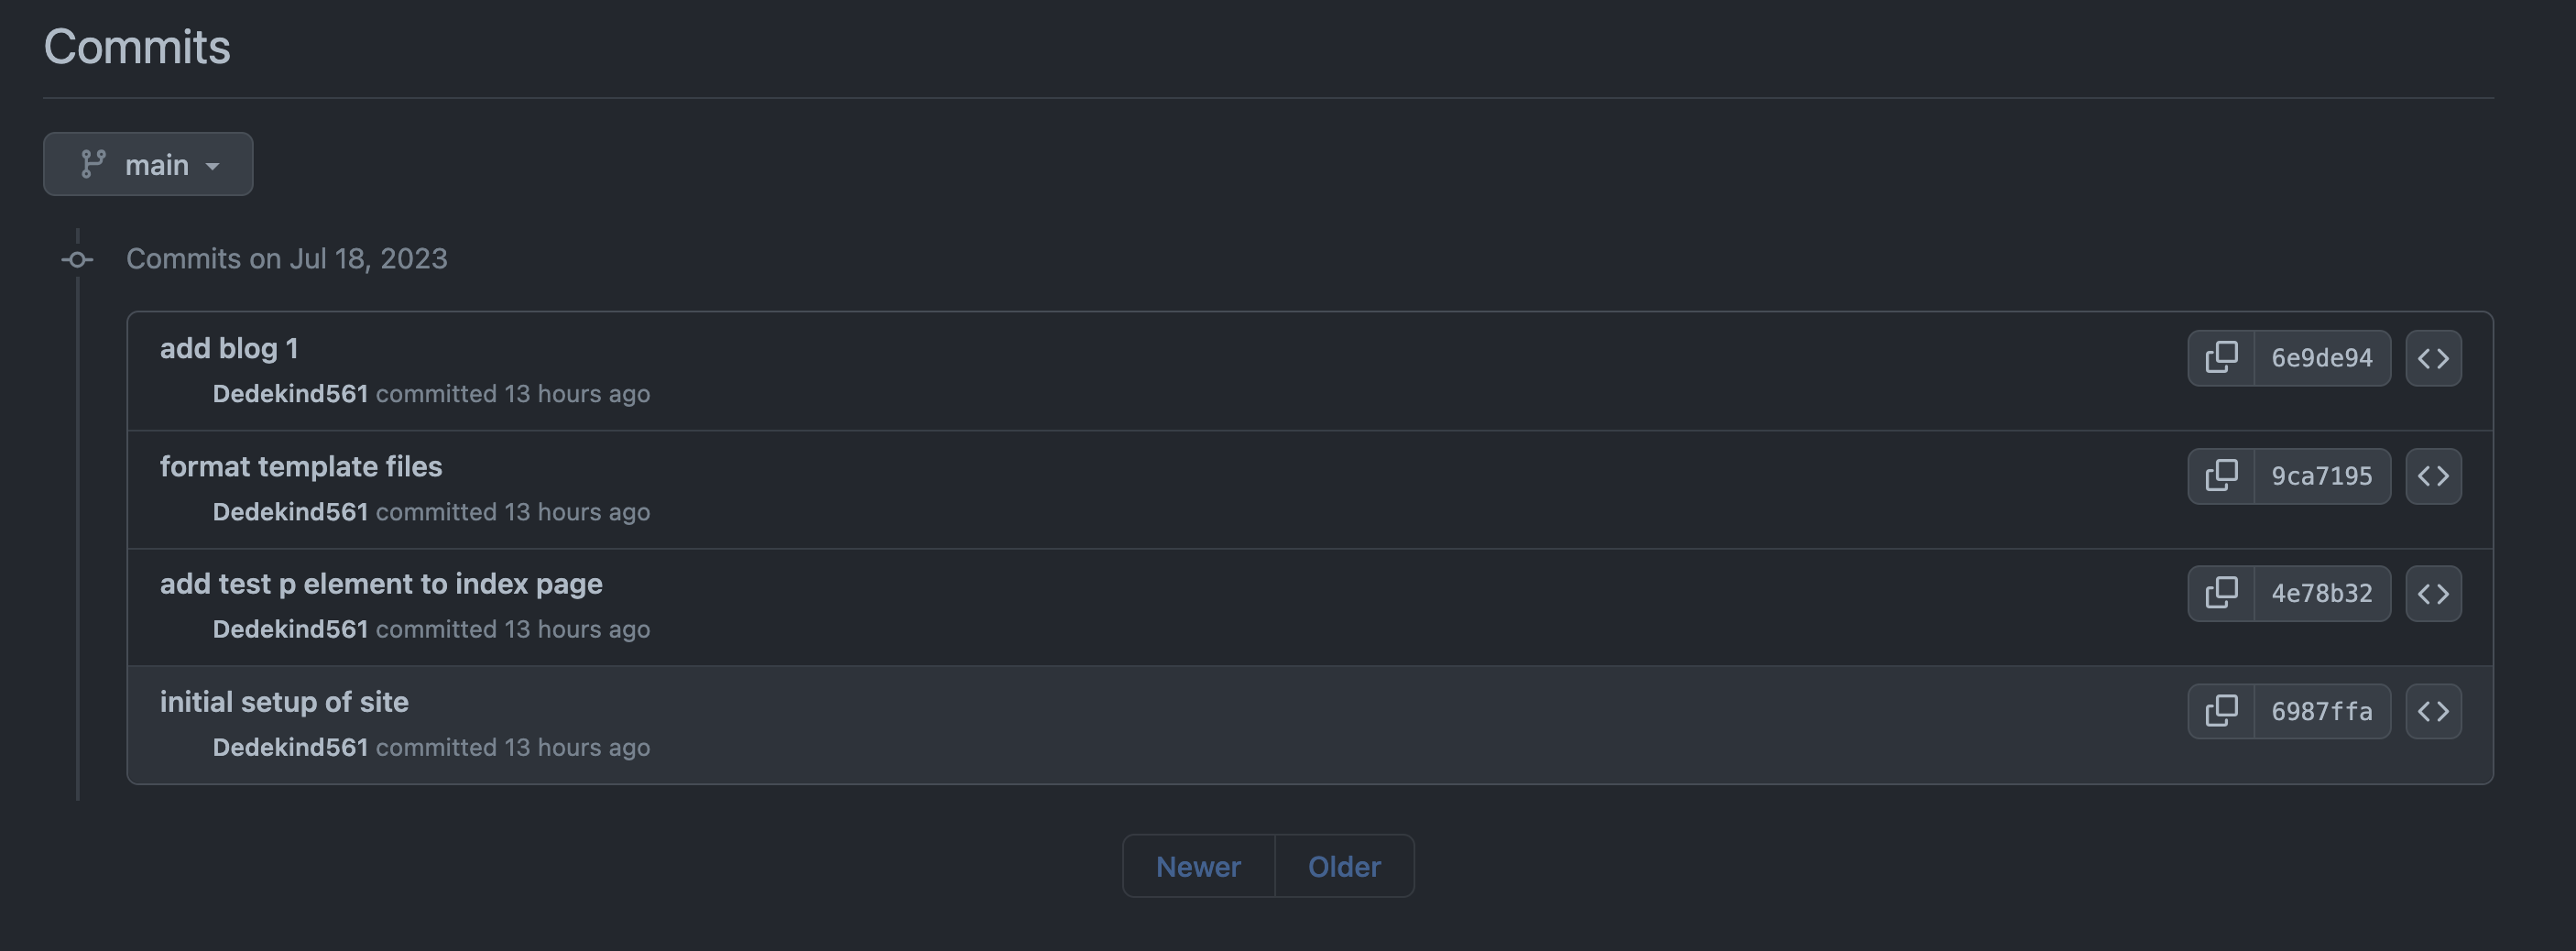
On the left page of the page, we see additional information:
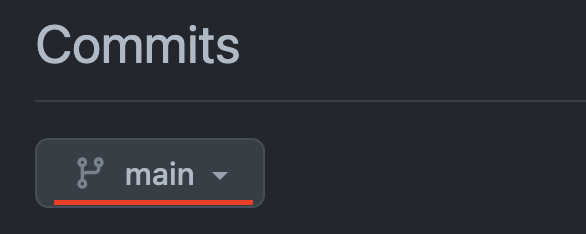
So what is
main?
main is a branch.
Commits form a sequence that look like this:
A branch represents a particular history of development in a project - the different versions there have been.
📖definition: Branch
There can be different branches with different names, which may have different versions.
For example, if we were testing out some different visual styles, maybe we would have one branch with some extra changes which make the website more blue, and a different branch with some extra changes which make the website more purple. These branches may share some commits in history, but have some extra different commits separately.
The main branch is often treated as a special branch - it’s where we put commits which people working on the project have agreed on. Other branches (e.g. the experimental purple branch) may have extra changes that have not been agreed on. If people working on the project agree the changes from the purple branch are good, we’ll add those changes to the main branch.
When we’re working on something new, we haven’t agreed with other people that our new thing is good yet, so we often don’t add our changes to the main branch straight away. Instead we make our own branch to experiment on.
We can start to create independent branches like this:
In the diagram above, we can continue to commit on the “week-1-coursework” branch without altering the history of the main branch.
✍️exercise 8.1
Creating a local branch
Open the
education-blogrepository in VSCode.Using this clip, create a new branch called
update-blog-1in your local repository 👉 https://youtube.com/clip/UgkxvXsnm_98Rx0NUZq25apQWA6POccRoQzw
📋 How can you check that you’ve successfully created a branch?
Check Git installation
Git
You will use Git continually as a developer. We will cover Git in more depth later in the course. Right now, we will just check that you have it installed.
Open up a terminal and run the command git --version to double check you have Git installed.
If it is installed successfully, you should get a version number (which may not be exactly the same as this example, but should look similar):
git version 2.40.0Otherwise, you will need to install it or ask for support on your Slack channel.
💡Tip
If you are working on a library computer, you do not have a terminal, but your github.dev account already has Git installed. (It’s called “Source Control”.) So you can skip this step.
Check your Planner
Planner on GitHub
You should have set up your Coursework planner.
Ensure you’ve completed the following issue 👉 https://github.com/CodeYourFuture/Coursework-Planner/blob/main/readme.md
Create a work folder
Learning Objectives
📢Important
Make a folder called The Docs in your home directory. Store all your work for the course in this folder.
You’ll need to create a The Docs folder to store your projects on the course. You can do this any way you like, but here we are using the terminal.
How to create a folder using the terminal
- Open a terminal on your computer.
For each of the steps below, you’ll need to use the command line in your terminal.
Use this cli documentation to remember terminal commands.
In your terminal, print your current working directory.
List the files and folders in your current working directory.
You’ll need a place to store your work for the course.
Make a new directory called
The Docsin your home directory.Change directory into the
The Docsdirectory.Double check you’re in the right place by printing your current working directory.
💡Tip
If you’re working on a library computer, skip this step. You will store your work in your GitHub account.
Development process
Ahmed and Naima are using the following development process for writing their blog:
- writing the blog in a single file on a single computer
- saving multiple versions of the file on the same computer
- taking turns to use the computer during the day
At the moment, the computer has a folder with the blog that looks like this:

✍️Exercise
Describe some of the challenges that Ahmed and Naima face when trying to write a blog together in this way.
Look in Slack. Has someone made a post describing Ahmed and Naima’s challenge? Share your answers as a reply to this post, making a conversation 🧵 thread.
Forking a repository
Learning Objectives
Often we want to take an existing project and start working on it independently. In other words: we start making our own versions of the project separate from the original project.
We can create a
When we create a fork on Github, the new forked repository gets a new url:
https://github.com/CodeYourFuture/cyf-demo-repo
When the user EagerLearner forks this repo, the path changes from CodeYourFuture to EagerLearner.
✍️🍴 Fork a repo
🍴 Fork a repo
- Go to https://github.com/CodeYourFuture/education-blog.
- Find the Fork button on this page.
- Click on the Fork button to create a new fork of the repository and set yourself as the owner of the fork.
📋 How can you check you successfully forked the original repository?
Hint: Check the URL of your forked repository
Git and Github for poets
This playlist introduces Git & Github: tools we’ll be using from now on.
These videos cover concepts that you’ll learn slowly over this course. Bookmark these videos and come back in the future when you need them.
For now, watch only the first video:
GitHub.dev
Learning Objectives
Completing coursework on a library computer
If you do not have a computer of your own yet, here’s how to complete your work directly on GitHub without a local environment.
Each repo on GitHub has a .dev environment so you can edit the code in your browser using an online VSCode.
You can go to this environment directly by replacing github.com with github.dev in the URL. For example, to open the Module-Onboarding repo, you can go to
https://github.dev/CodeYourFuture/Module-Onboarding
💡Tip
If you do have a computer, you should set up VSCode and a local environment. This is a workaround for people who don’t yet have the luxury of a personal computer.
Handshake
Learning Objectives
A handshake is a check for continuity between two different parts of the course. In this handshake, we’re going to check any important work done in the Fundamentals module is carried over to the Software Development Course.
A handshake isn’t the responsibility of a single individual: it is your collective responsibility as a cohort to check that you transition smoothly between two different sections of the course.
📝 Checks
Here are some checks:
- Double-check that the “XX X Rota” spreadsheet you created in Fundamentals is bookmarked in your new cohort Slack channel
Inspecting a commit
Learning Objectives
Recall that a commit is a snapshot of our project at some point in time.
Therefore, we should be able to check out a previous version of our project and look at the files and folders there. We can use the Github interface to check out the files and folders at a previous commit.
✍️exercise
Go back to this page https://github.com/CodeYourFuture/education-blog/commits/main
Locate the the commit with hash 4e78b32 and then look for the icon that that says “Browse the repository at this point in the history”.
Explore the code at this point in the history. What differences do you notice?
Do the same but for the commit cd981a0.
Inspecting previous versions
Learning Objectives
We can view the different commits of a project on Github. This means we can see what the website looked like before, in previous versions.
✍️exercise
Here are some different versions of the same educational backlog.
Deployed version A educational blog
Deployed version B educational blog
Deployed version C educational blog
Questions
- What is the difference between Version A and Version B on the index page (the page you first land on after clicking on the link)
- What is the difference between Version C and the main version of the site.
- Which commit from the education-blog repo correspond to Version C? Remember to check the git history.
- Which commit from the education-blog repo correspond to Version A?
Install VSCode
Learning Objectives
We use VS Code to write all of our code in the course. It is known as an Integrated Development Environment (IDE) and really helps you write great code.
💡Tip
If you are working on a library computer, use the online version of VSCode called Github.dev.
The interface is mostly the same, but you cannot install extensions or use the terminal. You can complete all the tasks in the onboarding module without these features.
Interview Introductions
Learning Objectives
Almost every job interview will require you to introduce yourself. This usually happens towards the beginning of the interview when the interviewer asks you a question such as “Tell me about yourself?”. Being able to answer this question effectively is a crucial employability skill. It’s your chance to sell yourself and make an amazing first impressions. Like many interview questions, this question needs to be handled in a certain way.
Your introduction should be short but not too short, ideally around 1-2 minutes.
You don’t need to give a summary of your whole CV or explain the finer details of your favorite project. It should be a sales pitch that tells the interviewer the exact things that make you perfect for this role. It can be easy to go off on a tangent when you’re nervous so make a plan and stick to it.
Being too concise is a problem too. This is an opportunity to really sell yourself. Answering this question with just a few sentences wastes that opportunity.
It’s important to match the introduction to the job. This means emphasizing the skills, experiences & interests that make you perfect for it. It is good to have a stock introduction but it will need tweaking for different jobs.
It’s also important to show your passion for the job. The IT jobs market is very competitive. Showing that you are incredibly passionate could be a unique selling point for you.
One way of structuring this is by using the Present-Past-Future model:
Present: Start by briefly mentioning your current role or what you are doing at the moment (eduation, job, etc.). Give an overview of your responsibilities.
Past: Mention your relevant experience, skills, or education. Focus on achievements and how they shaped your current professional identity.
Future: Highlight what you want to do next and why you’re excited about this opportunity.
Start thinking about how you would construct an introduction for yourself. It may be useful to review some reputable external resources such as Indeed to get different perspectives and see examples.
Learning as a community
Learning Objectives
At The Docs, we learn as a community.
In this session, we’re going to describe how we harness our community to learn together.
Resources
The facilitator will make a copy of this presentation 👉 Learning as a community presentation or set the same thing up on a physical board with sticky notes.
Preparation
- Facilitator: Review how this works and the Miro board Learning as a community before class.
- Facilitator: Split the class into groups of no more than 6.
- Facilitator: Ensure everyone can access the board if you are online.
- Facilitator: Make sure every group has access to sticky notes and pens if you are in person.
Introduction
The facilitator will use the Miro board presentation to guide trainees and volunteers on a discussion about how we learn together as a community.
Next steps
Learning Objectives
For trainees
In this section, we’re going to go through a set of questions/tasks to clarify what we’re going to do in the next part of the course.
Get into pairs with somebody you’ve not paired up with today and try figuring out the answers/solutions to the following questions/tasks:
- Using the curriculum, locate the page setup page for the upcoming module.
- Using the curriculum website, locate the page with the prep material for the first week of the next module
- List the things you need to install (if anything) for the upcoming module.
- Check you can find the backlog page for the Induction sprint. Double check you’ve copied all the issues from the backlog over to your Course Planner.
- Identify all the issues with 🔑 icon that are marked as Priority. What does the Priority icon 🔑 mean?
- Go to your group Slack channel and start a thread 🧵 outlining times you’re free to meet up to discuss the prep work during the week
- Which day ⏰ should you start the prep work for the upcoming HTML module?
- Experiment with your project planner: can you filter by Size, Week 1, Tech ed, PD etc.?
For volunteers
- Locate the classroom planning board for your region (if one exists)
- Locate the day-plan for the next week/module
- Check the instructions and links on the Priority 🔑 issues for the upcoming week (both Tech Ed and PD)
- In the day-plan for the upcoming week identify the instructions for any workshops and visit the repository containing that readme. Check the instructions make sense.
Professional Accounts
Learning Objectives
Download and install the following software or register for the apps if you have not done so already.
Click on the links to go to the registration pages. Keep your login details for all sites/apps consistent and always use your real name.
📢Important
Real name
We recognise you may need to keep your birth name private. When we say real name, we mean the name you go by. It does not have to match your birth certificate or any other legal document. It has to be consistent and professional.
Every time you create an account which can have a profile picture, you should set one up. Follow these professional image guidelines when picking an image. Use the same picture for every account.
💡Robohash
Gmail, Google Account
Make a new Google account if you do not have a professional one already. What is a professional email address?
- Use your real name.
- Don’t use any numbers or words that are not your name.
- Never put the year of your birth or age in your professional email address.
Your email address should look something like this:
This is your public professional email address. Use it to sign up for all your professional accounts unless you can use your GitHub.
- I have made a professional Google account and Gmail address.
- I have explored the Google Suite, such as calendar, docs and spreadsheets.
GitHub
You will use GitHub to store your code and to collaborate with your peers. You have already made a GitHub account, but you need to check it is professional. You can change your username in your settings. You can add your professional email address in your settings too. (You can have more than one email address on your account.)
- My GitHub account shows my professional name
- I have added my professional email address to my GitHub account.
Sign up for LinkedIn. LinkedIn is the largest professional social network. You will use it to help you get a job and to advance your career.
Make a LinkedIn account. Use your real name. Sign in with Google. Connect with your cohort.
Your cohort is your first network, and this is one of the most valuable things you can develop at The Docs. A strong, tightly linked, professional network is a powerful asset, so begin building it today.
- I have made a LinkedIn account using my professional email address.
- I have used my real name.
- I have connected with my cohort.
- I am following The Docs.
Slack
Slack is our community space and how we communicate with each other. Download and install it now. If you are not using your own computer, log in to the web version instead.
- I have downloaded the Slack app on my computer and phone.
- I have logged in to the The Docs ITP workspace.
- I have found and joined my class channels.
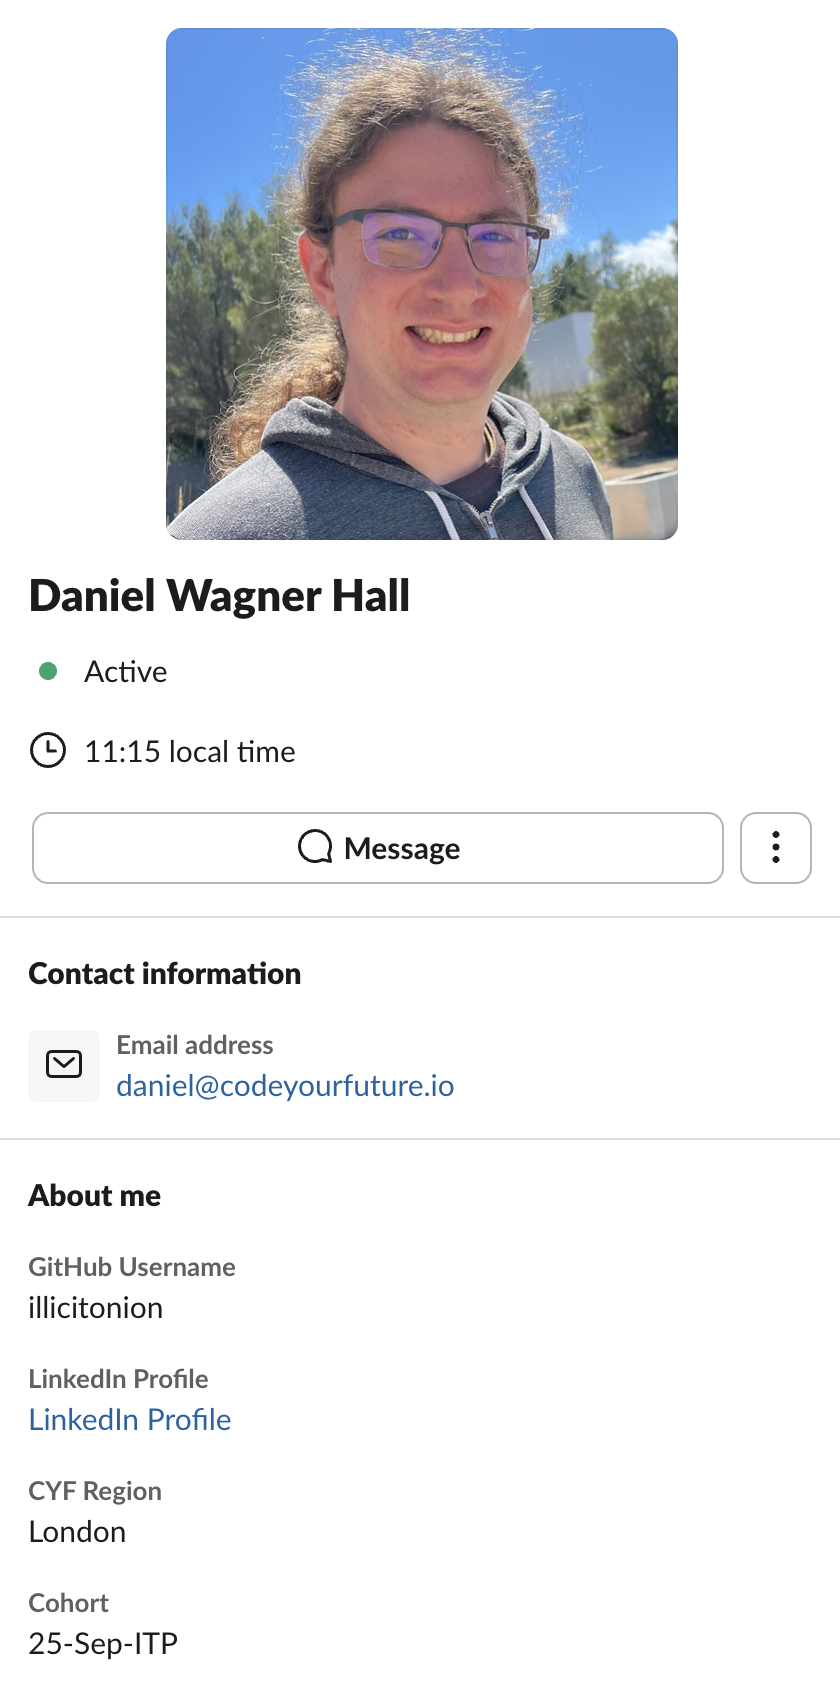
- I have updated my profile with my picture, my professional email address, my GitHub username, my Linkedin profile, my region, and my cohort.
- I have introduced myself on Slack.
See this example fully filled-in Slack profile - make sure yours has at least the same fields filled on:
Applications
If you’re working on a library computer, you can’t download these applications. You will use GitHub Dev to complete coursework instead.
Google Chrome
- I have downloaded and installed Google Chrome.
- I have logged into my professional profile on Chrome.
Use your professional Chrome profile for all your The Docs work. You will often have to share your screen during sessions, so keep your personal internet use private and away from your professional profile.
VSCode
We will use Visual Studio Code (VSCode), a professional IDE you will use on this course and at work.
- I have downloaded and installed Visual Studio Code.
Zoom
Usually we use Meet, but sometimes we use Zoom for remote sessions. Install it now.
- I have downloaded and installed Zoom onto my computer.
Setting up Coursework planner
Learning Objectives
GitHub
In Fundamentals, you should have set up your Coursework planner.
Ensure you’ve completed the following issue 👉 https://github.com/CodeYourFuture/Coursework-Planner/blob/main/readme.md
Sharing history
Learning Objectives
Earlier on, Ahmed and Naima realised they also need the following:
a way to share the history of the project between different users and different computers
To share a project and its history, we can use an online platform called GitHub
GitHub is a platform where teams can store projects along with a history of their different versions.
By storing projects on GitHub, multiple users can gain access to the history of a project.
📖Definition: Repository
✍️Exercise
Explore 🔍
In this exercise, you’ll need to explore a GitHub repository.
You’ll need to look around and figure out where to find different files and find out information about them.
⚠️ You won’t be expected to know what the files do at this stage.
Go to the following link: https://github.com/CodeYourFuture/education-blog
It will take you to a GitHub repository called education-blog.
Answer the following questions using the page linked to above:
a) View the README.md file. What do the instructions tell you?
b) How many files are there inside the blogs folder?
c) How many lines are there in the package.json file?
d) Find the file with the blog content you can see on the live site here blog 1
You’ll learn more about these type of files throughout the course.
We can use the Github interface to explore the different commits (versions) of a project too.
✍️exercise
Explore 🔍
Go to the following link: https://github.com/CodeYourFuture/education-blog/commits/main
Try answering the following questions:
Go to the commit that says “add test p element to index page”
Questions
- How many files were changed in this commit?
- Who created the change?
- What time did the change take place?
✍️exercise
Explore 🔍
Go to the following link: https://github.com/CodeYourFuture/education-blog/commits/main and locate commit that says “remove \ and # from start of paragraph”
Questions
- How many files were changed in this commit?
- What change was made in this commit?
Version control software
Learning Objectives
To improve their way of working, Ahmed and Naima realise they need the following:
- a way to both know what the most recent version is
- a way to know what the old versions were, and in what order (i.e. how they got to the current version, and what content they may have deleted that they may want to get back)
To manage the different versions of the blog project, they decide to use Git.
📖definition: Git
In Git, we create different versions of a project over time by creating commits.
A commit is a snapshot of our project at a particular point in time. You can also think of a commit as a particular version of a project.
Commits store the following information:
- what changed in this commit
- who created the change
- what time the change happened
- what the previous commit was
A typical timeline of commits might look like this:
📝Commit hashes
Commits also have a hash associated with them. A hash is a long string of characters used to identify a particular commit.
A typical hash will look like this: fec6909d6de23c75e77960986a9b6a7aee7feec7 but you will often see them abbreviated to the first few characters like this: fec6909
Viewing files from a git clone
Learning Objectives
Once you’ve got a local copy of a codebase on your local machine you can start to view the files and folders in that codebase. You can use a code editor like VSCode.
VSCode is an application that enables developers to view and edit files on their local machine.
✍️Exercise
Explore VSCode
Figure out how to open the cloned repository on your local machine in VSCode.
Explore the repository in VSCode and use the code editor to look at the various files and folders.
Try opening the Integrated Terminal in your VSCode window
🤔 If you get stuck on any of these exercises, it’s a good idea to search online. For example, you could Google “opening terminal in vscode”
📝Note
If you’re working on a library computer, use dot dev to open the repo in your browser, and navigate the files and folder there. You cannot open a terminal in the library, so come to class to try this part out.
Working locally
Learning Objectives
Here is a diagram representing how the repositories interact after forking and cloning:
Sketch this diagram in your notebook. When you inevitably get mixed lost about where your changes are, you can refer back to this diagram to help you understand what’s happening.
📝Note
If you’re working on a library computer, just fork the repo to your own GitHub account. You can’t clone a repo on a library computer, so come to class to try cloning out. You can explore the files using dot dev in the same way as you would in Visual Studio Code.
We can also use Git on our local machine to perform similar tasks as we do on GitHub. So we need to address the following question:
How can we get a copy of an existing GitHub repository on our local machine?
In other words, we need to get a
We call a local copy of a GitHub repository a clone. The process of copying a remote repository on to a local machine is called cloning.
🎯 Goal: Clone a remote repository to your local machine
You’ll need to clone your fork of the education blog repo. Follow through the steps in the video “How to clone a repository from GitHub to Visual Studio Code”.
🎗️ Reminder:
- Use the URL for your fork of the
education-blogrepo when you are cloning - When selecting the location to clone your files, choose the
CYFfolder you created in the module prep
Wrapping up Git
Learning Objectives
🕹️Creating a commit - Figure it out 🔍
📋 Double check the learning objectives from this sprint. Make a note of those objectives that you’re still struggling with.
Now you’ll need to create a commit.
You can use the “How to commit changes and push them in Visual Studio Code” video to figure out how to create a commit.
We’ll cover this topic often in workshops. Come to a CYF centre to work on this with a mentor.
- Try opening your clone of education-blog in VSCode
- Make sure you’re on the
mainbranch - Make a new branch for your changes
- Try fixing a typo in the
README.mdfile - Try using the video to create a commit of your work.